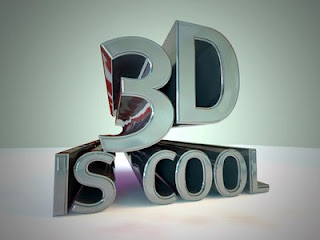
 Today I've decided to do a tutorial instead. I'll start with simple basic tutorials for beginners. Requests are open for more advanced tute. I'll be using Autodesk 3ds Max 2009 as reference so some terms or workflow might not apply to your choice of 3D apps.
 Create your own cool 3D text
Most 3D apps have text primitives or built-in text shape generator. This is the most straight-forward method. Or you can also import your text outline you've created in Illustrator or similar. BTW, this tut can be applied to other shapes as well, like a logo. In this tut I will use this import-method.
Preparing the vector shape from Illustrator or similar
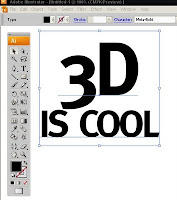
After creating your text in Illustrator, you need to convert it into *vector shapes or outline. You can do this by Ctrl+Shift+O or Menu>Type>Create Outline. Now save a version that your 3D apps can import. 3ds max can except AI (Illustrator) files directly but it need to be saved in AI v8 format. Most other 3D apps can accept Autocad drawing format: DWG or DXF which you use Export from Illustrator.
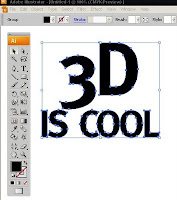
* Vector Primer
Vector means mathematically created shapes or graphic as opposed to Raster which is pixel-based thingy like photos (digital or scanned). A vector shape retains the info for the path coordination making it a cool format for import/export between applications.
Importing the shape into 3D apps
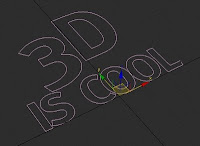
This is pretty straightforward for 3ds max. I just drag n drop the AI file onto Max. You can also use Import. Now you'll see your text as spline shapes. You need to attach all the shapes to be a single shape. Rename it to something cool. It is good habit to rename everything in 3D. Seriously. Now is also a good time to rescale your text to suitable size - Illustrator's dimension is for paper-size, which is quite tiny compared to 3D app's dimension where usually people build cars or houses!
*In Max, rescaling the object won't really change the internal dimension, (which will give trouble later on) you need to rescale it up from the sub-object level.
Gimme the freakin' depth!
To give the flat shape some depth, simply apply Extrude or Bevel from the modifier panel. Voila! you got 3D text.
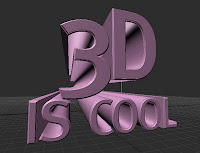
In my final image, I use a slightly more advance bevelling called Bevel Profile. I also add a Mentalray (renderer) chrome material plus simple lighting setup.
Hope this helps. Any questions or comments are welcome.
Have fun!
No comments:
Post a Comment
Thanks for leaving your mark!